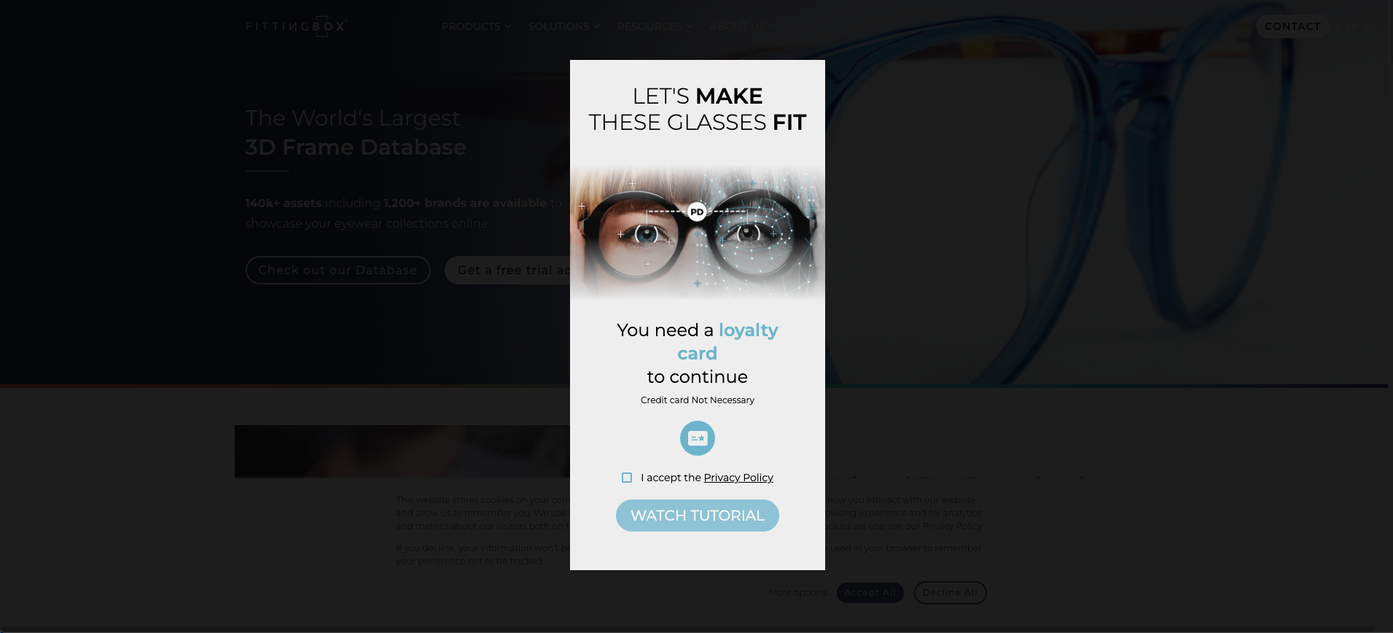
Pop-up integration
This example shows how to integrate PD Measurement in overlay mode, meaning the experience appears on top of your website page, with a darkened background behind it.

Requirements
-
API Key for PD Measurement
Provided by FittingBox once the contract is signed.
Example (non-functional):6hKjd9zh5gDa7C1mqY3UnbjOlsLvCfqly45hd1 -
Basic knowledge of:
-
HTML / CSS
-
JavaScript
-
Integration Parameters
| Parameter | Description |
|---|---|
apiKey |
Your unique API key provided by FittingBox |
widgetUrl (optional) |
Default: "https://pd-measurement.fittingbox.com" |
Integration Steps
On the page where you want to integrate PD Measurement, follow these steps:
1. HTML Setup
a. Load the PD Measurement API script
<script src="//msrt-integration-api.fittingbox.com/index.js" type="text/javascript"></script>
b. Add the integration container (wrapped inside a div)
  <div class="overlay"></div>
  <div class="msrt-wrapper">
    <div id="msrt-container"></div>
  </div>
c. Add an open button
<button style="width: fit-content" onclick="launchMsrt()">
      MEASURE PD /* Text Label of the button */
</button>
2. JavaScript
a. Set your API access
 const params = {
apiKey: "6hKjd9zh5gDa7C1mqY3UnbjOlsLvCfqly45hd1", // Replace the value by the API Key received
  widgetUrl: 'https://pd-measurement.fittingbox.com',
};
b. Add the “close popup” function
window.closeMsrt = function () {
  msrtDiv.style.display = "none";
  overlayDiv.style.display = "none";
};
c. Define PD Measurement opening behavior
const msrtDiv = document.querySelector(".msrt-wrapper");
const overlayDiv = document.querySelector(".overlay");

window.launchMsrt = function () {
  msrtDiv.style.display = "block";
  overlayDiv.style.display = "block";
  Msrt.createWidget("msrt-container", {
    ...params,
    onGetResultPd: (result) => console.log('onGetResultPd: ', result), // callback pd result, optional
    onTooManyErrors: () => console.log('onTooManyErrors'), // callback more than 3 errors, optional
    onClose : () => { window.closeMsrt() } // callback to hide the container
});
};
Optional Callbacks
You can use the following callbacks to customize the user experience:
| Callback | Description |
|---|---|
onGetResultPd |
Retrieve the PD measurement result and automatically fill a field on your website |
onTooManyErrors |
Handle the case when users encounter more than three errors (e.g., display an exit or help message) |
onClose |
Hide the overlay container when the experience is completed or canceled |
In this example, callbacks only log results to the browser console, but you can adapt them to your needs.
3. CSS
a. Define the PD Measurement container
#msrt-container {
  position: absolute;
  inset: 0;
}
b. Define the overlay style
This prevents users from interacting with your website while PD Measurement is active.
.overlay {
  display: none;
  position: fixed;
  inset: 0;
background-color: rgba(0, 0, 0, 0.8); /* Change overlay background color and opacity here */
}
c. Define the container size for smartphone view
.msrt-wrapper {
  display: none;
  position: fixed;
  inset: 0;
  margin: auto;
  max-height: 700px;
  max-width: 394px;
}
d. Define the breakpoint for desktop view
The switch between mobile and desktop modes is handled automatically by PD Measurement.
Keep the 768px breakpoint consistent with the integration rules.
@media (min-width: 768px) {
  .msrt-wrapper {
    inset: 2rem;
    max-width: 700px;
  }
}
e. Style the iframe container (optional)
#msrtWidgetIframeContainer{
  border-radius:5px;
}